


.svg)


How to set up the WooCommerce SnapScan Payment Gateway
Megan
28 August, 2023
Built your online store with WooCommerce? You’ll love our WooCommerce Payment Gateway.
The WooCommerce SnapScan Payment Gateway is free to install and provides your customers with convenient payment options. Customers making a purchase on your online store can pay using their SnapScan app or their bank card.
This guide shows you how to install and set up the SnapScan Payment Gateway, so you can start accepting SnapScan app and online card payments from your site. In this guide, the SnapScan Payment Gateway is referred to as the plugin.
What this guide covers:
- Section A: How to install the plugin
- Section B: How to set up the plugin. This includes how to set up both SnapScan app payments and card payments, as well as how to enable online card payments on your SnapScan account.
- Section C: How to configure your webhook URL
- Section D: What the SnapScan payment options will look like to customers visiting your site.
Watch the video below for a step-by-step guide on how to set up your plugin or scroll down to read the instructions:
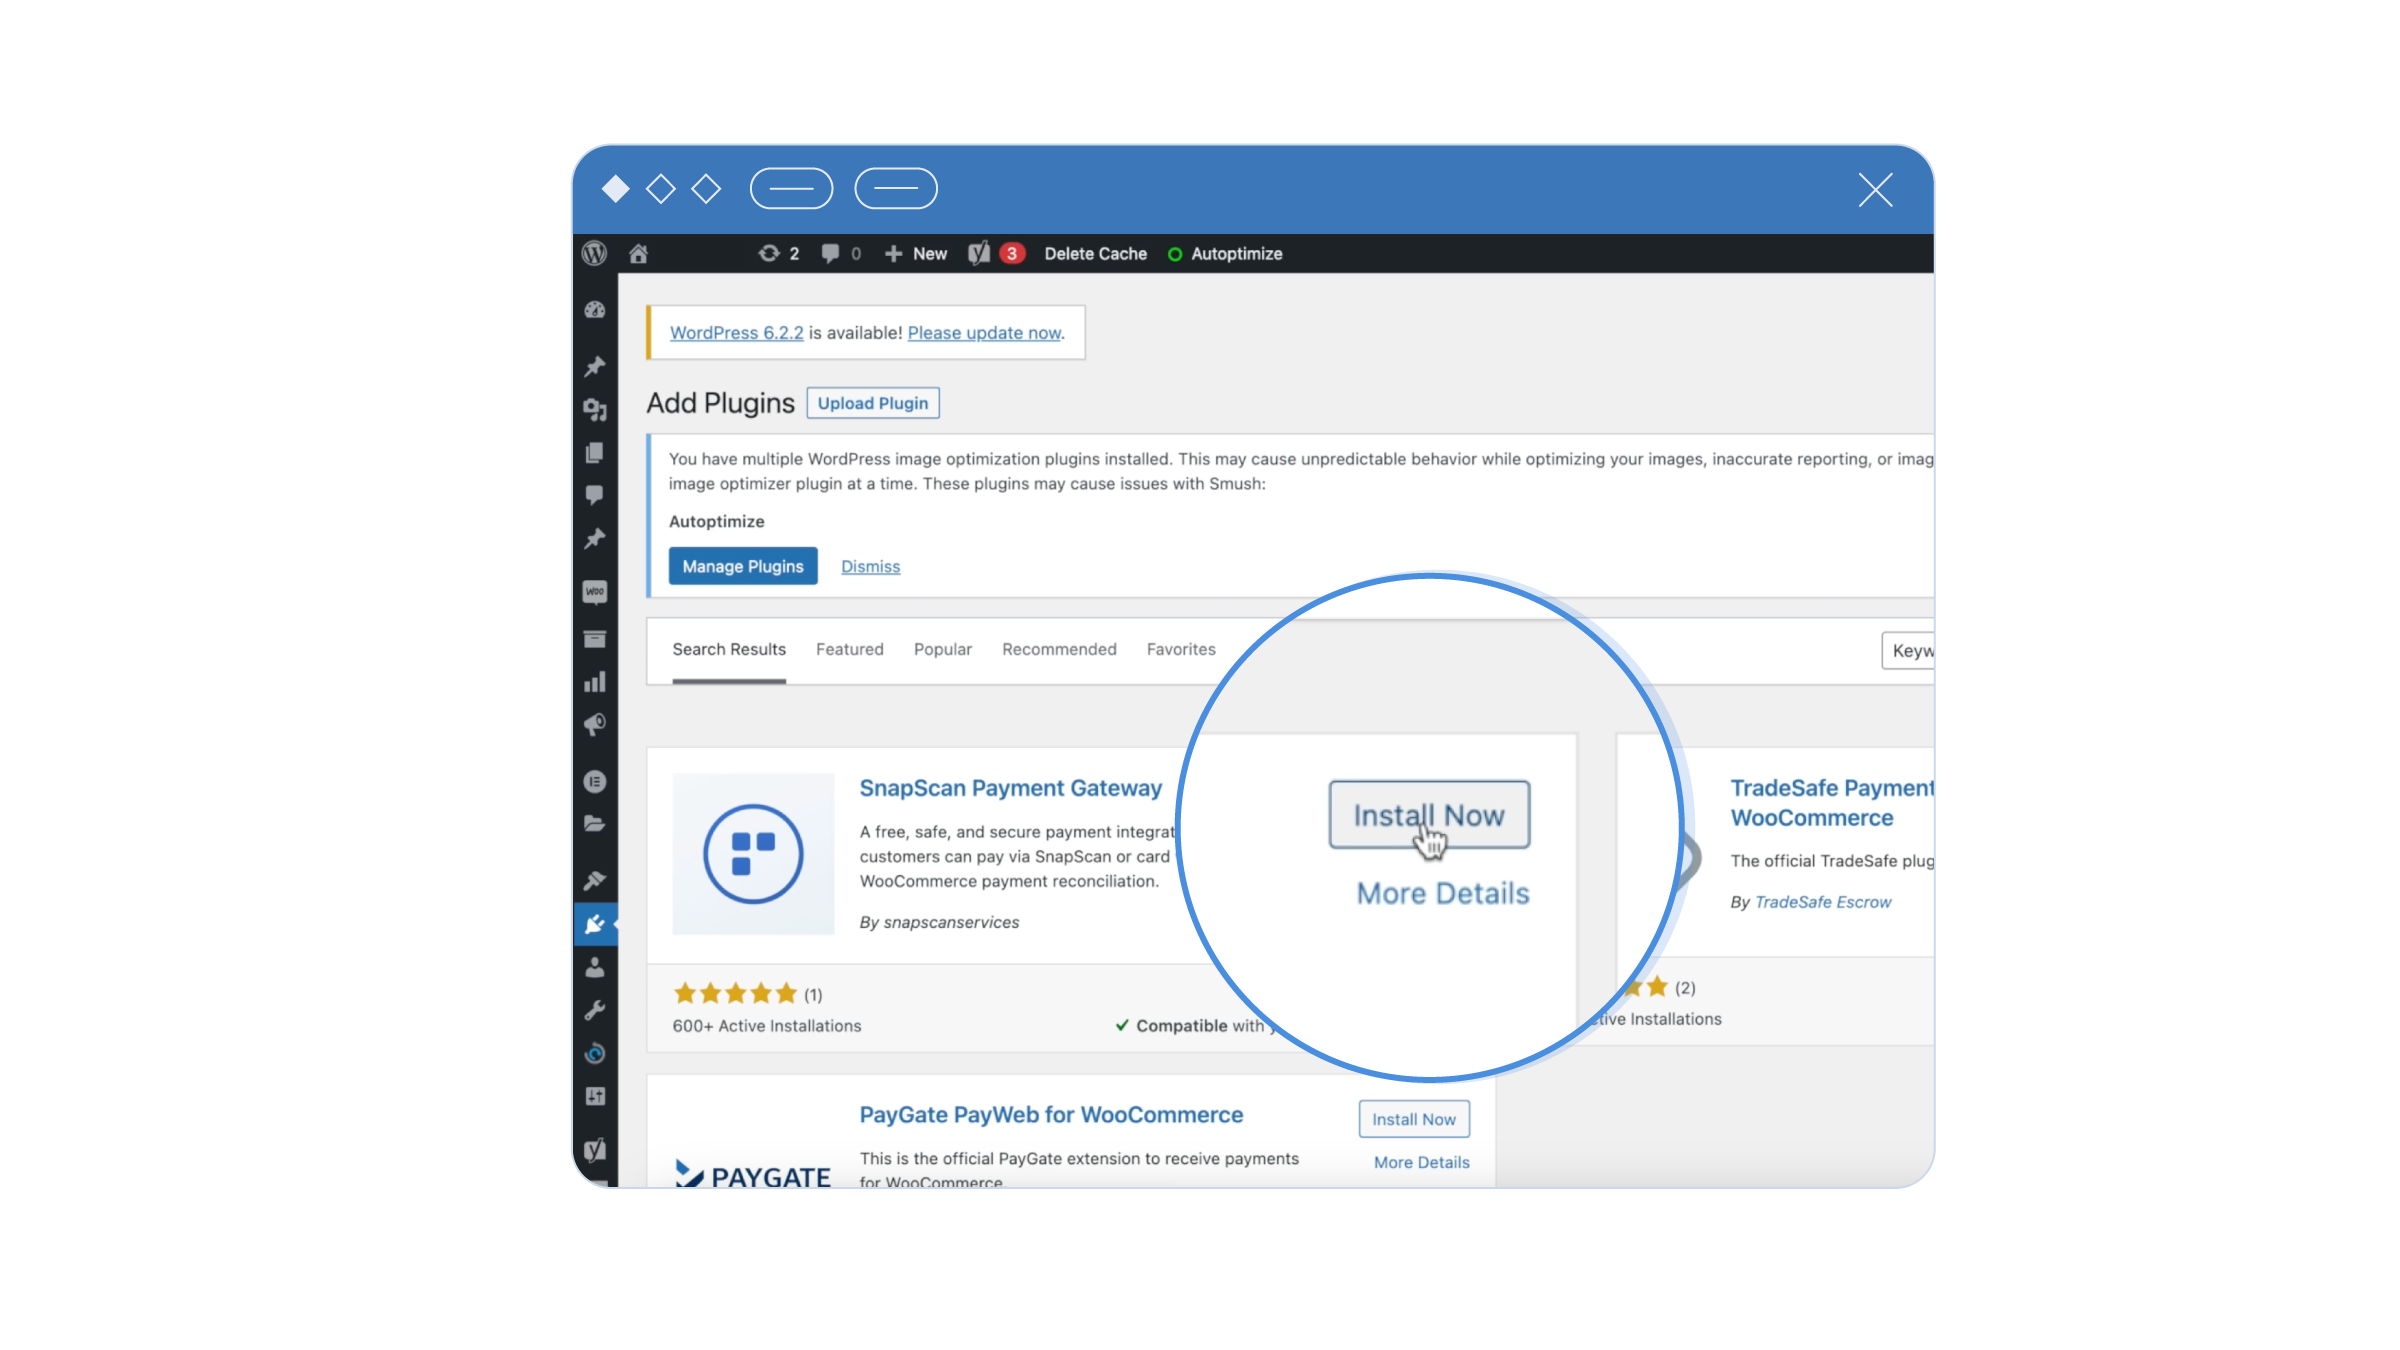
Section A: How to install the plugin
- Log into your WordPress admin panel
- Click the Plugins icon on your menu bar.
- Select Add New
- Search for ‘SnapScan Payment Gateway’ in the search bar on the right
- Click the Install Now button on the SnapScan Payment Gateway tile
- Once Installed, click Activate
- You’ll now see the plugin in the list of installed and activated plugins on your site. Ensure you select Enable auto-updates so that your plugin automatically updates whenever a new version is available.
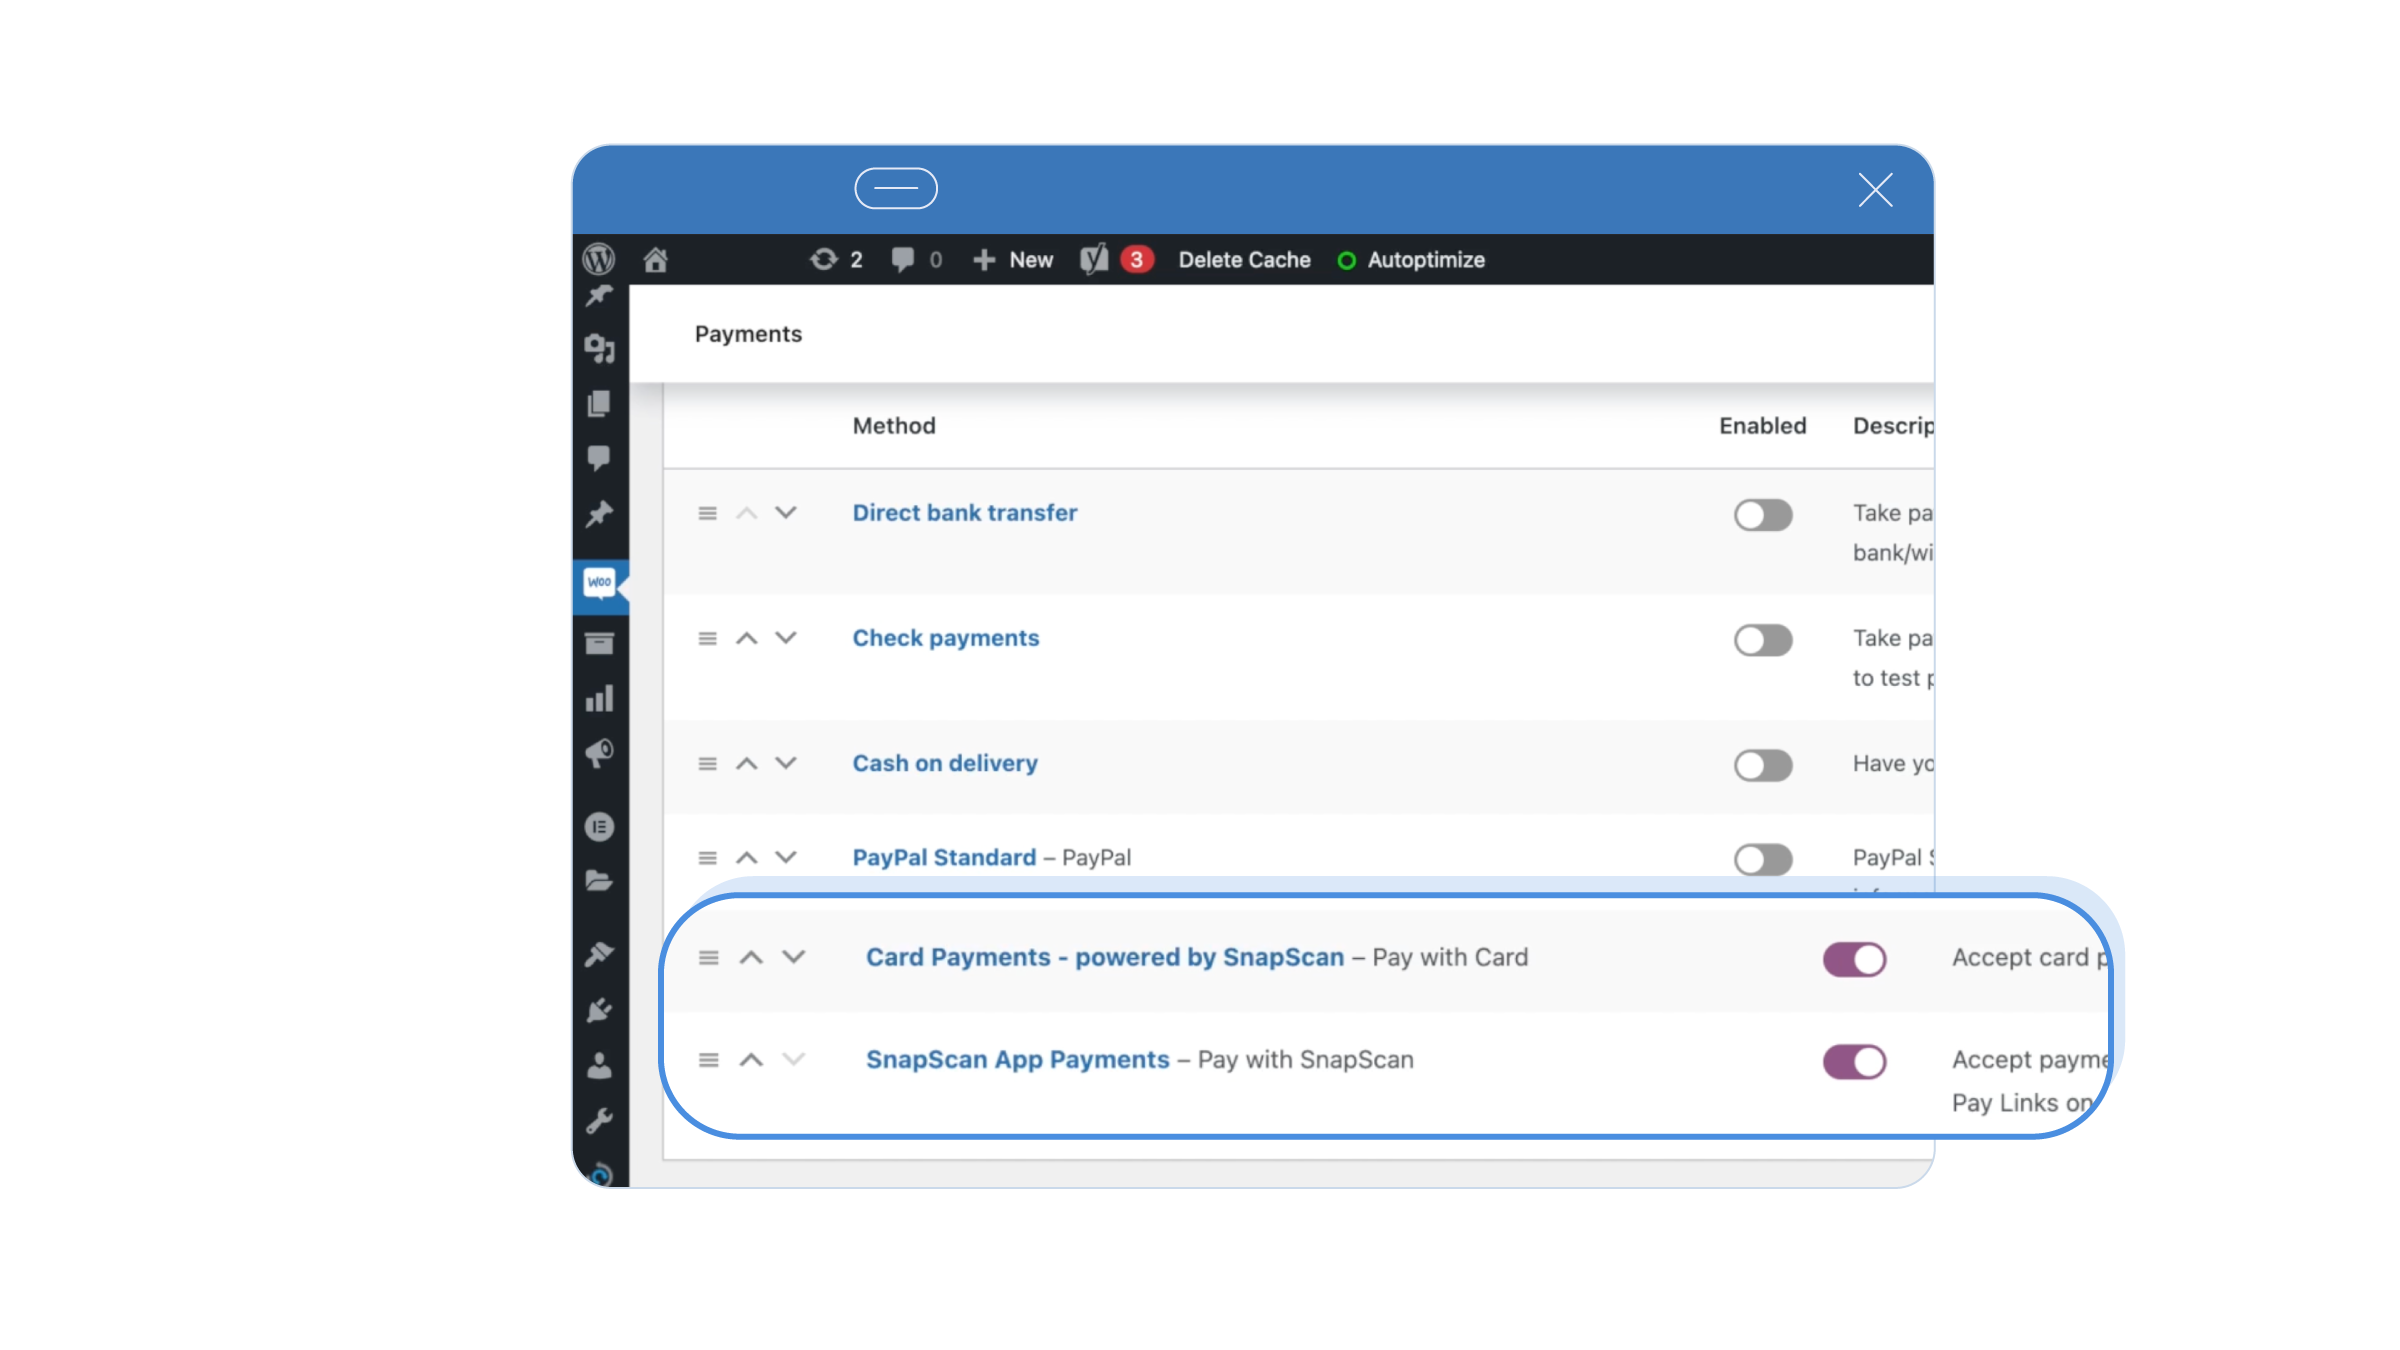
Section B: How to set up your plugin
You will need to set up both payment types on your plugin to allow customers to pay with their SnapScan app or bank card.
- Select WooCommerce on your menu bar > and then select Settings
- On the Settings page, select the Payments tab
- Scroll down to where you’ll see two new payment methods – Card Payments – powered by SnapScan and SnapScan App Payments.
Set up SnapScan App payments
Click the Manage button next to SnapScan App Payments and fill in the details below:
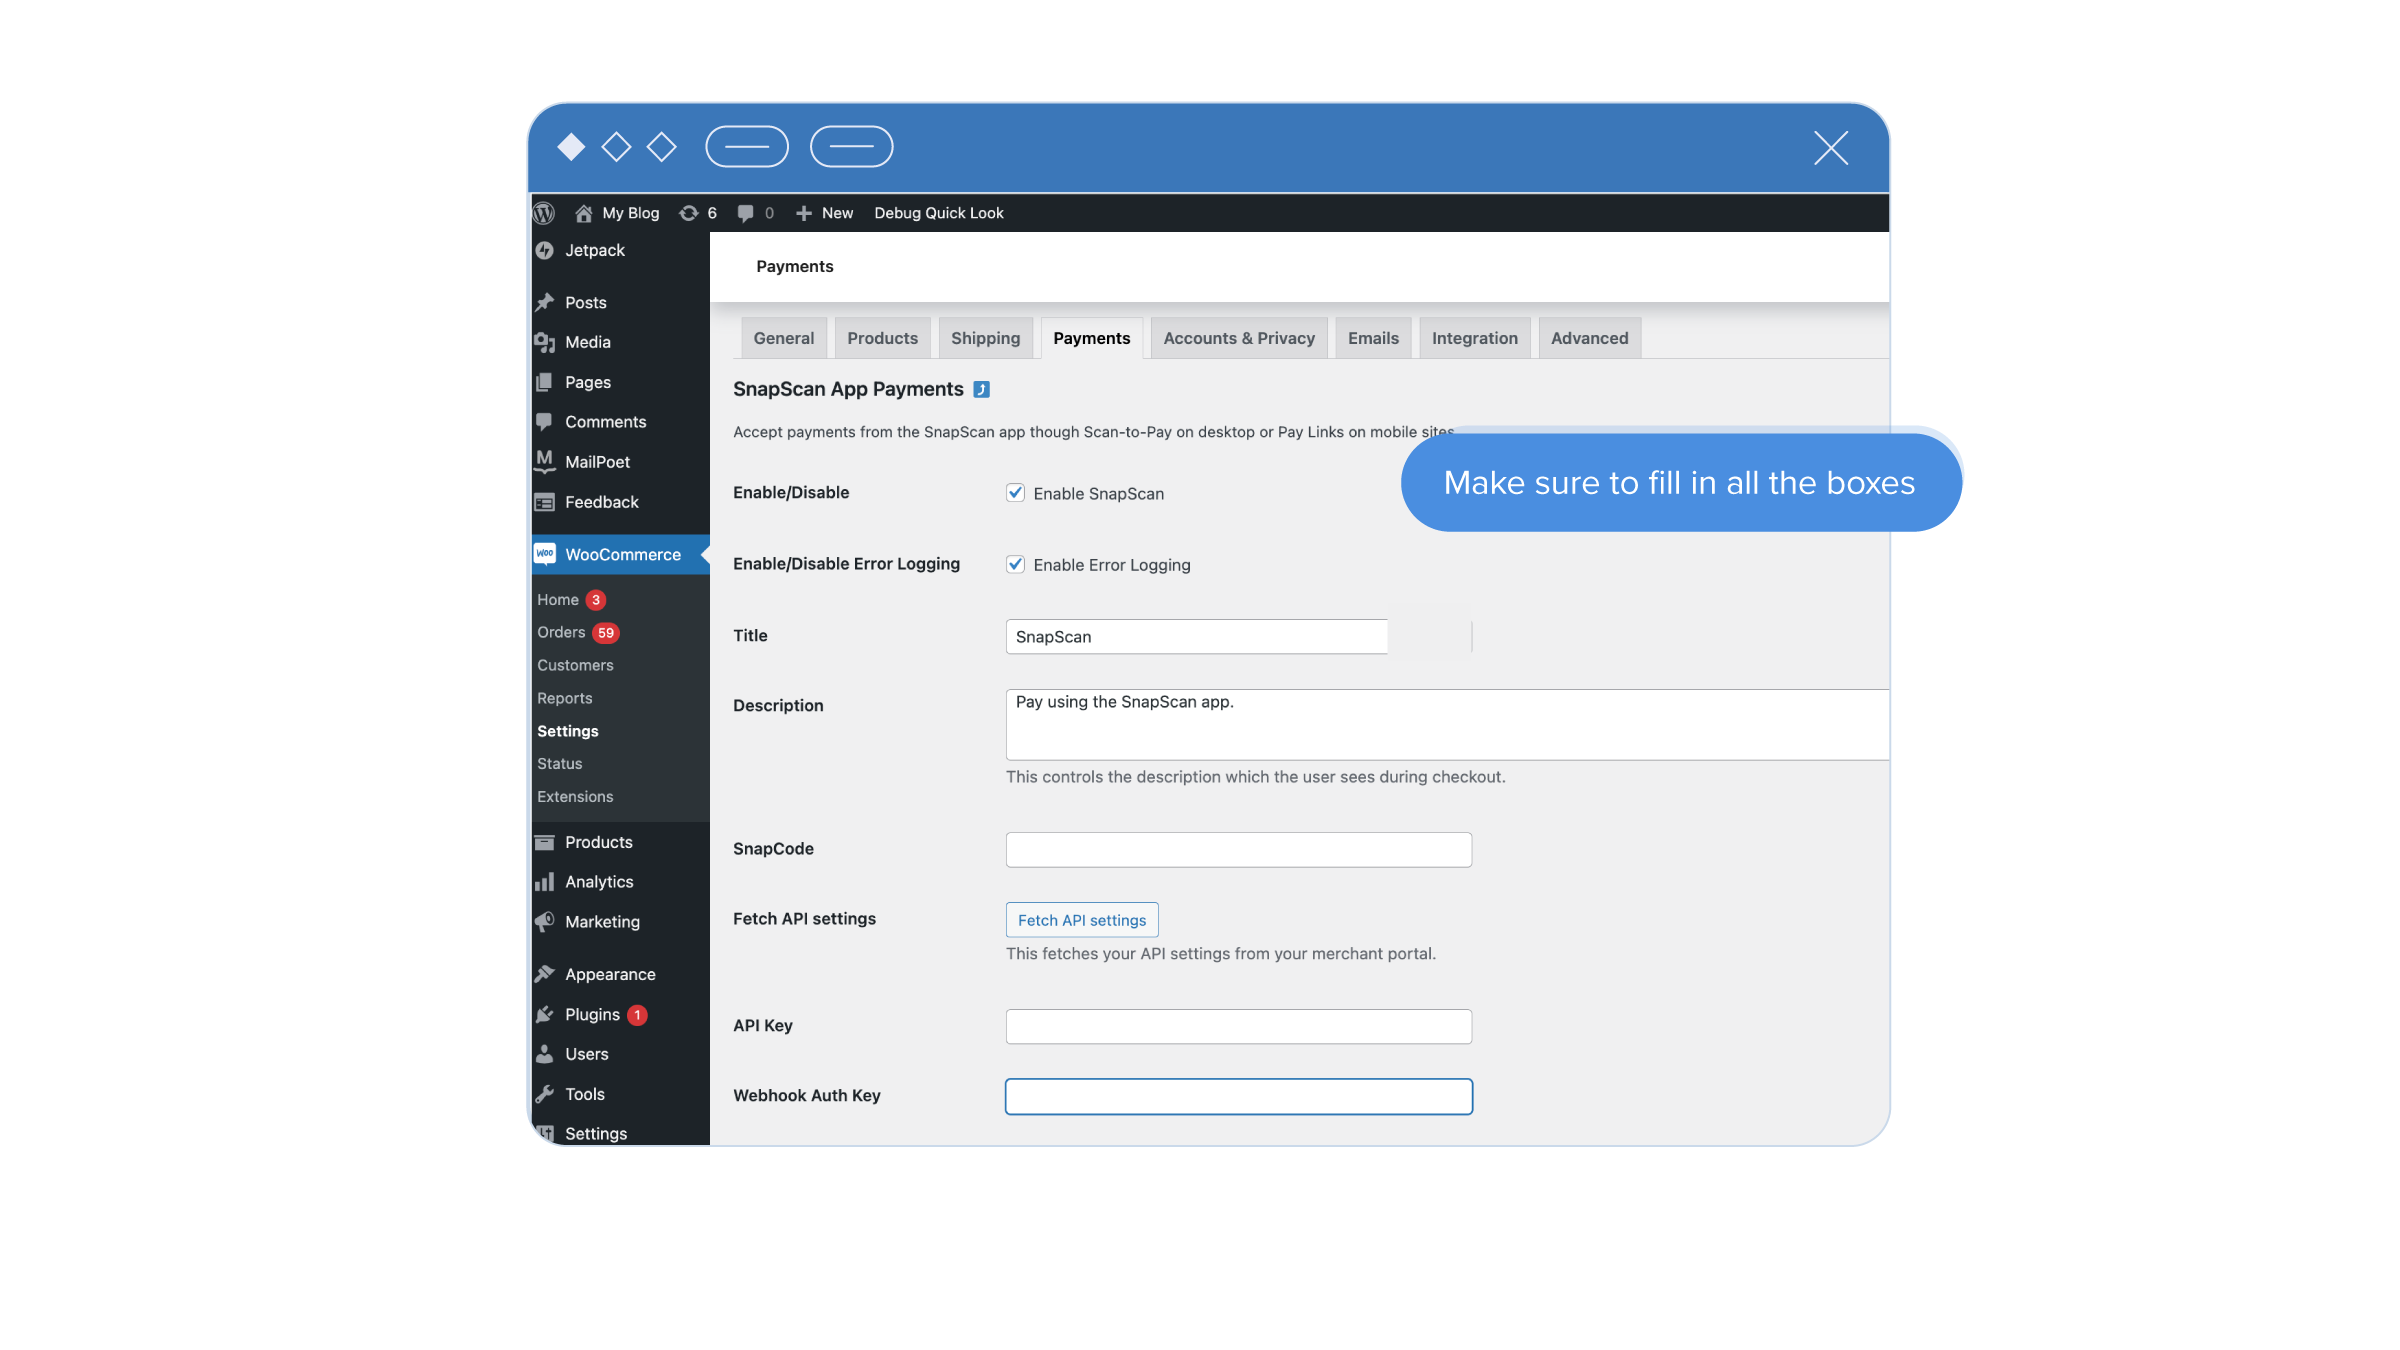
- The Enable SnapScan tickbox should automatically be selected; if not, select it.
- The Enable Error Logging tickbox should automatically be selected; if not, select it.
- The Title box will display SnapScan
- The Description box will display ‘Pay using the SnapScan app.’
- Complete the SnapCode box with the SnapCode that you want SnapScan app payments to be allocated to. You can view your SnapCodes in your Merchant Portal (see steps below), or you can ask for your SnapCode by contacting our Support team at +27 (0) 21 250 0960 or help@snapscan.co.za.
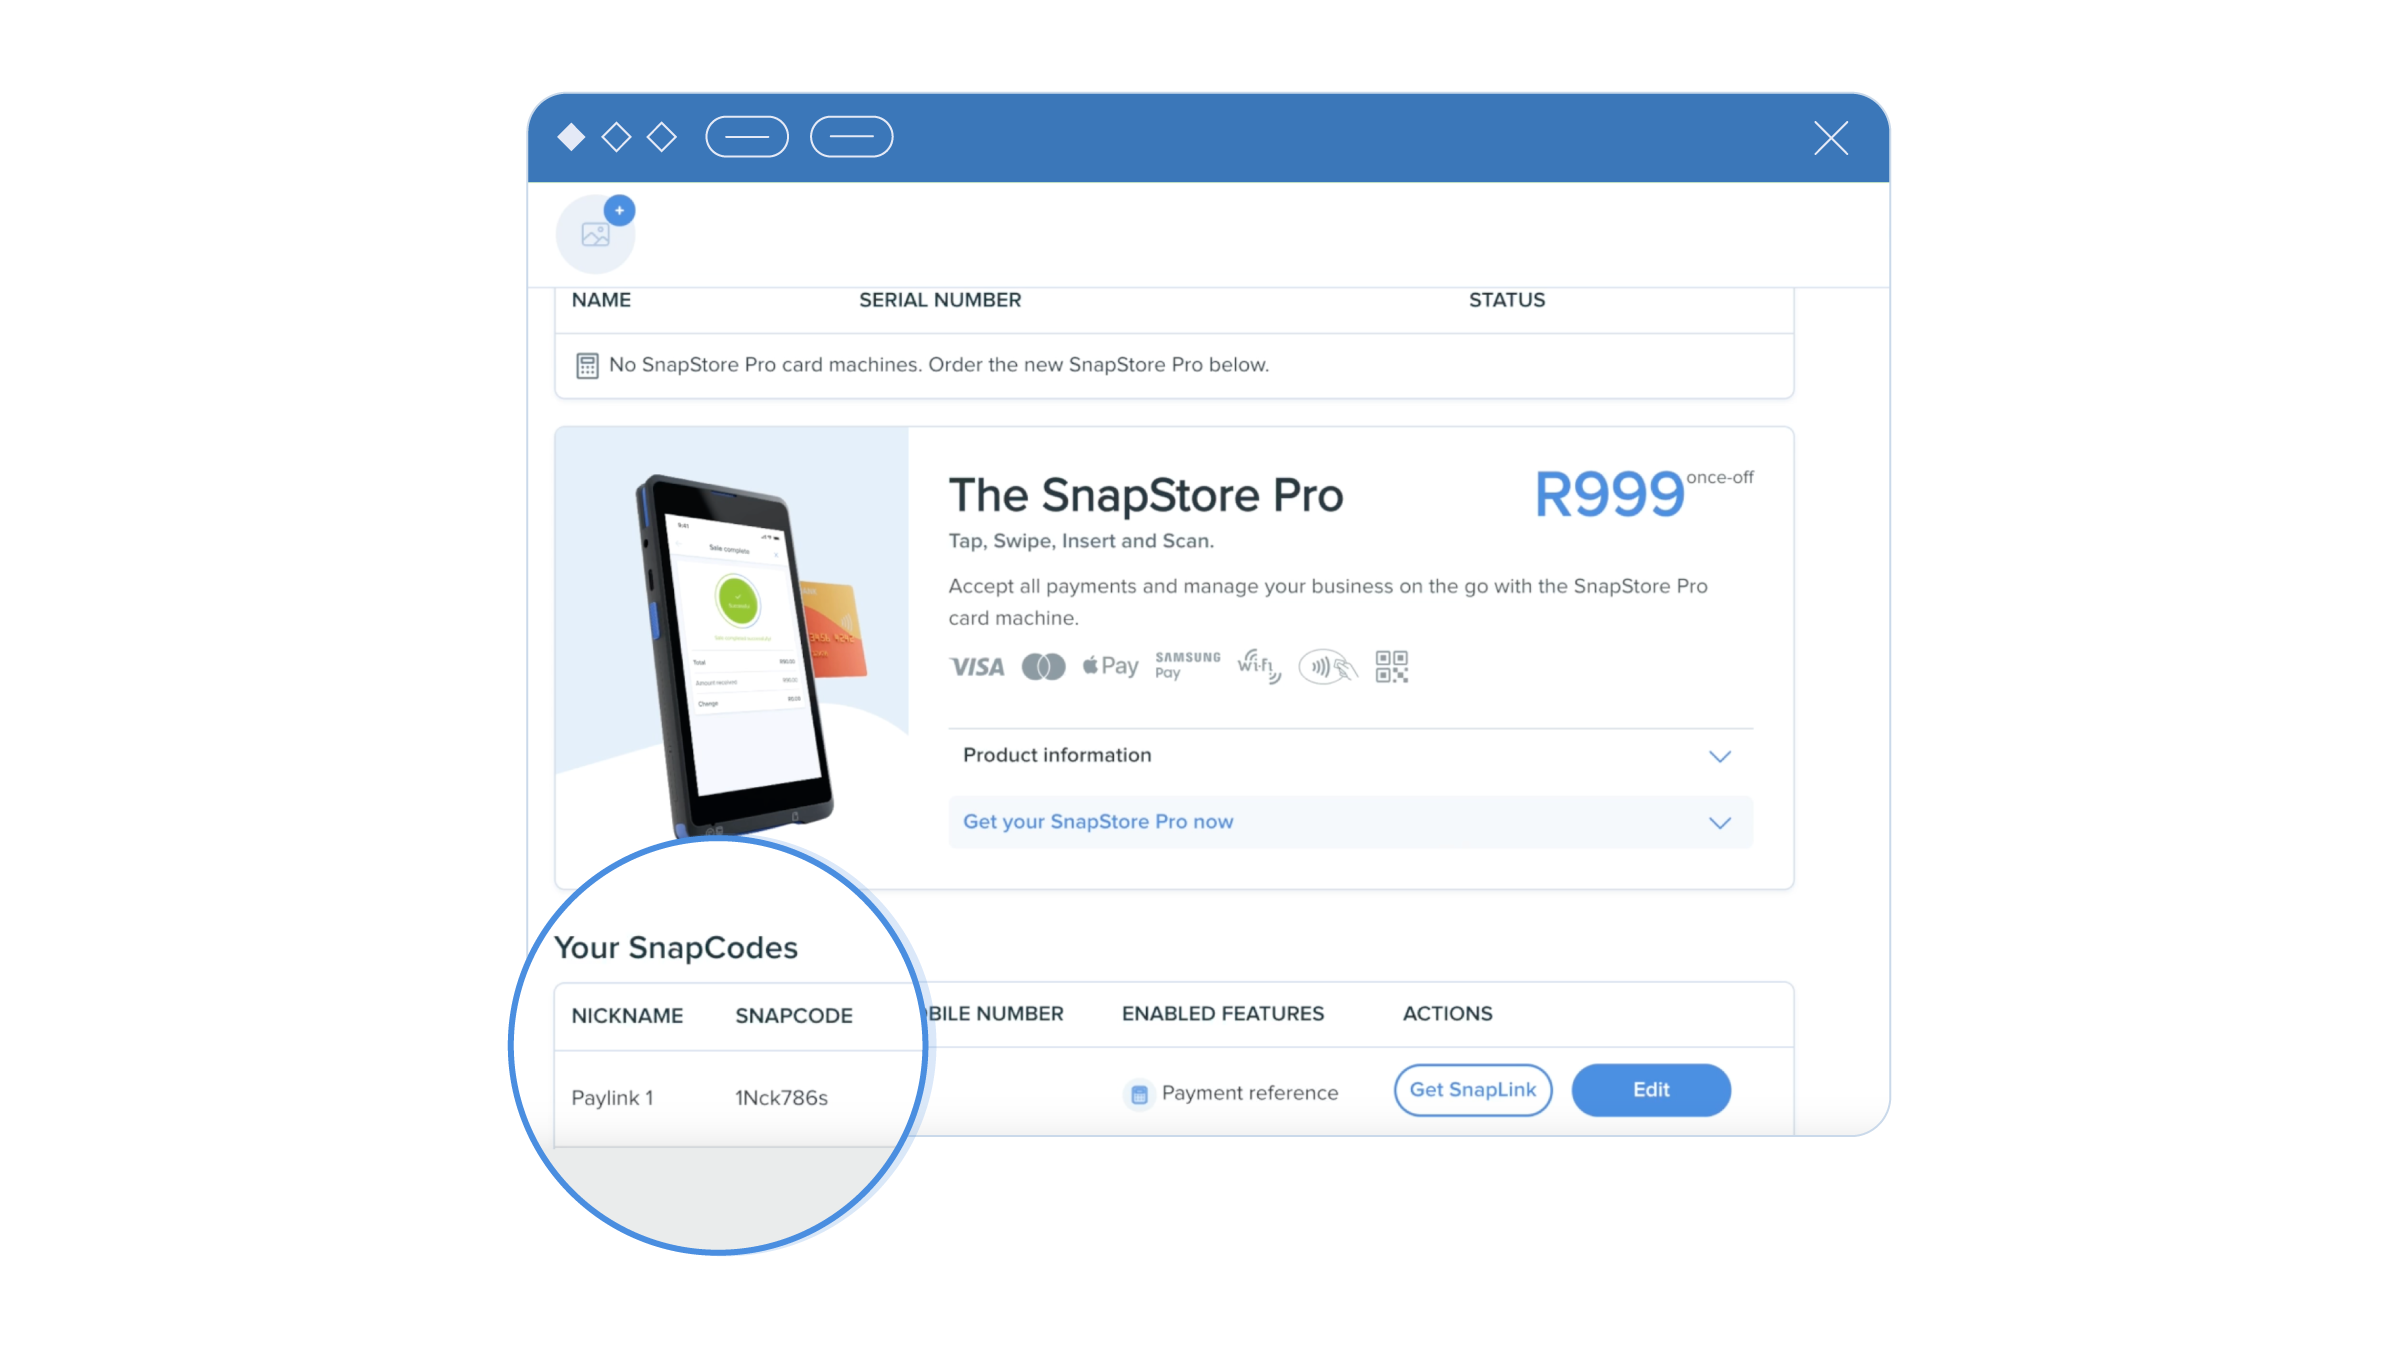
i. Log in to your Merchant Portal
ii. Head to the Payment methods page.
iii. Scroll down to the Your SnapCodes section. Here you’ll find your SnapCode(s) listed under the SNAPCODE column. - Once you’ve added your SnapCode details, click on the Fetch API settings button. You will be redirected to your Merchant Portal.
- Once you’ve logged in, your API key and webhook auth key will automatically be fetched and filled in under the “API Key” and “Webhook Auth Key” options.
- The API key is provided by SnapScan to authorise transactions
- The webhook auth key is the authorisation key for using webhooks with SnapScan. Webhooks are used to confirm the status of a transaction.
- Save the changes by clicking on the Save changes button.
Set up Card payments – powered by SnapScan
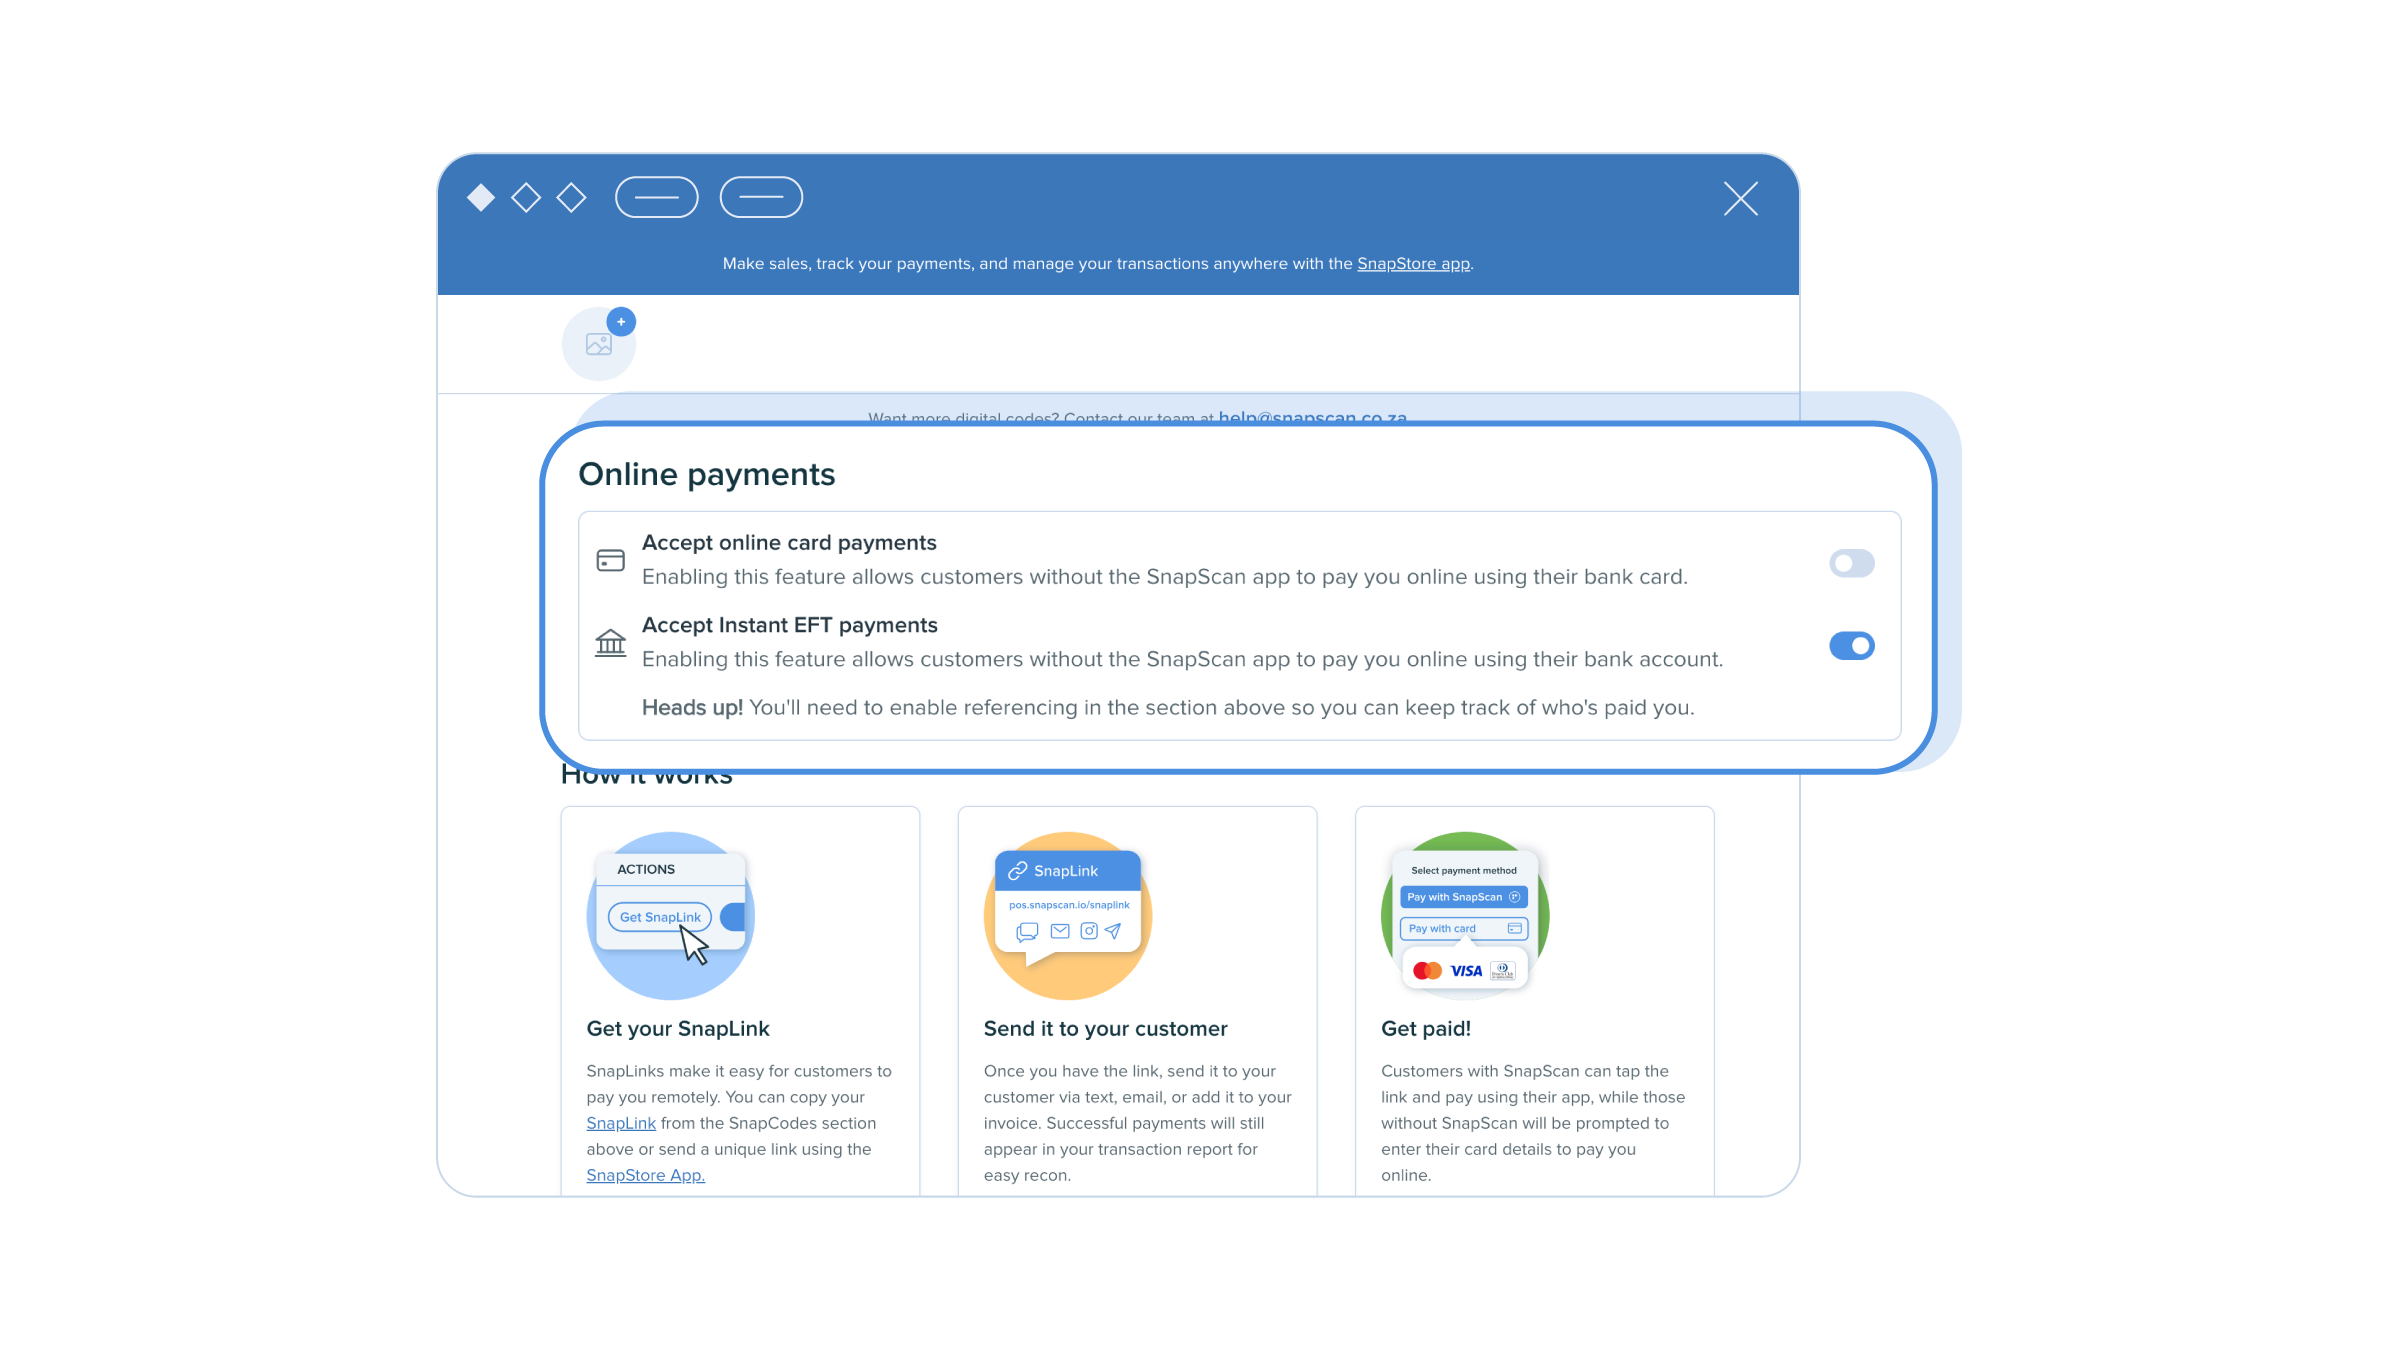
Before you can accept card payments on your WooCommerce site, you need to enable online card payments in your Merchant Portal.
- Log in to your Merchant Portal to enable online card payments on your account.
- Head to the Payment methods tab
- Scroll down to Online payments and enable the “Accept online card payments” toggle.
- Head back to the Payments tab on your WooCommerce Settings page.
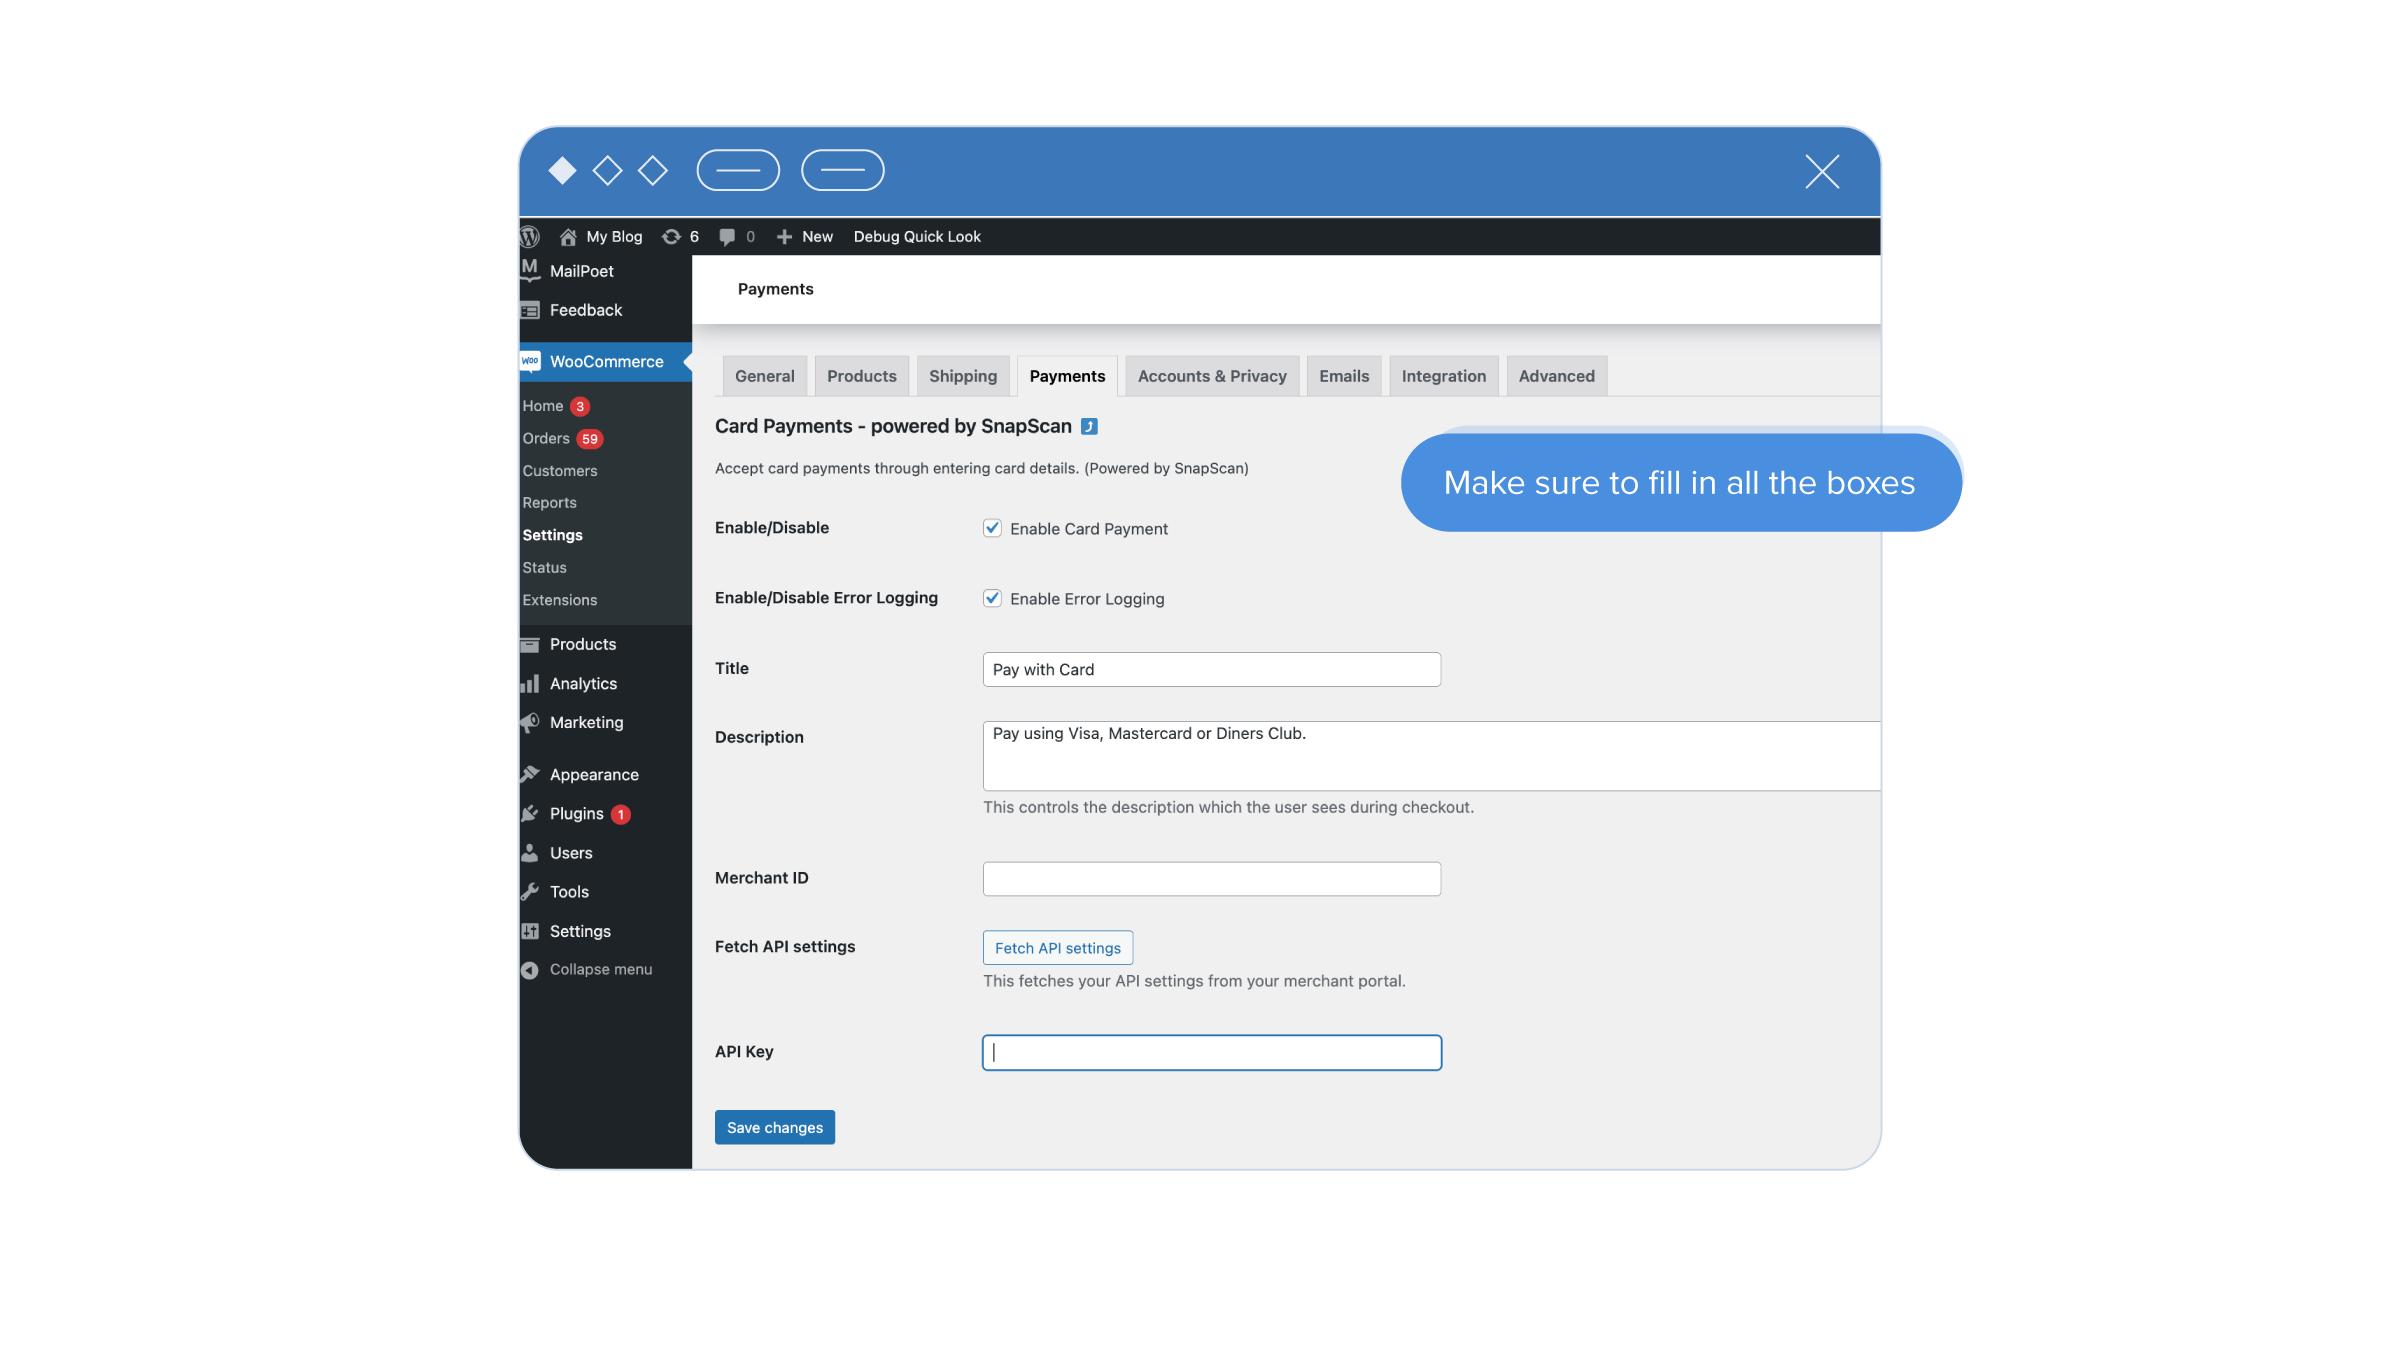
- Click the Manage button next to Card Payments – powered by SnapScan, and fill in the details below:
- The Enable Card Payment tickbox should automatically be selected; if not, select it.
- The Enable Error Logging tickbox should automatically be selected; if not, select it.
- The Title box will display ‘Pay with Card’.
- The Description box will display ‘Pay using Visa, Mastercard or Diners Club’.
- Your Merchant ID is the same as your SnapCode. Fill in the same SnapCode details you used when setting up the SnapScan App Payments section of your plugin.
- The API key may have been fetched when you set up your SnapScan app payments. If this option is already populated, proceed to step 12. If the option is NOT populated, follow steps i- ii below before moving on to step 12.
i. Click on the Fetch API settings button. You will be redirected to your Merchant Portal.
ii. Once you’ve logged in, your API key will automatically be fetched and completed for you in the “API Key” box. - Save the changes by clicking the Save changes button.
Section C: How to configure your webhook URL
A webhook is a message that is automatically sent by one system (the source system) to another system (the destination system) when a certain event happens in the source system. The message will contain details about the event. A webhook URL is the website address of the destination system that the message is sent to.
SnapScan’s system will send webhooks to your online store when SnapScan app and card payments made by customers from your online store are processed successfully or are declined. You will need to setup your online store to be able to receive webhooks from SnapScan.
How to get your webhook URL
Once you’ve installed and set up your plugin, we will configure the webhook URL for you using your store’s website address. Please contact our Support team on +27 (0) 21 250 0960 or help@snapscan.co.za and provide them with your website address on hand.
Section D: How the payment options will display on your site
Once an order is made, your customers will be presented with the option to pay using their SnapScan app or their bank card.
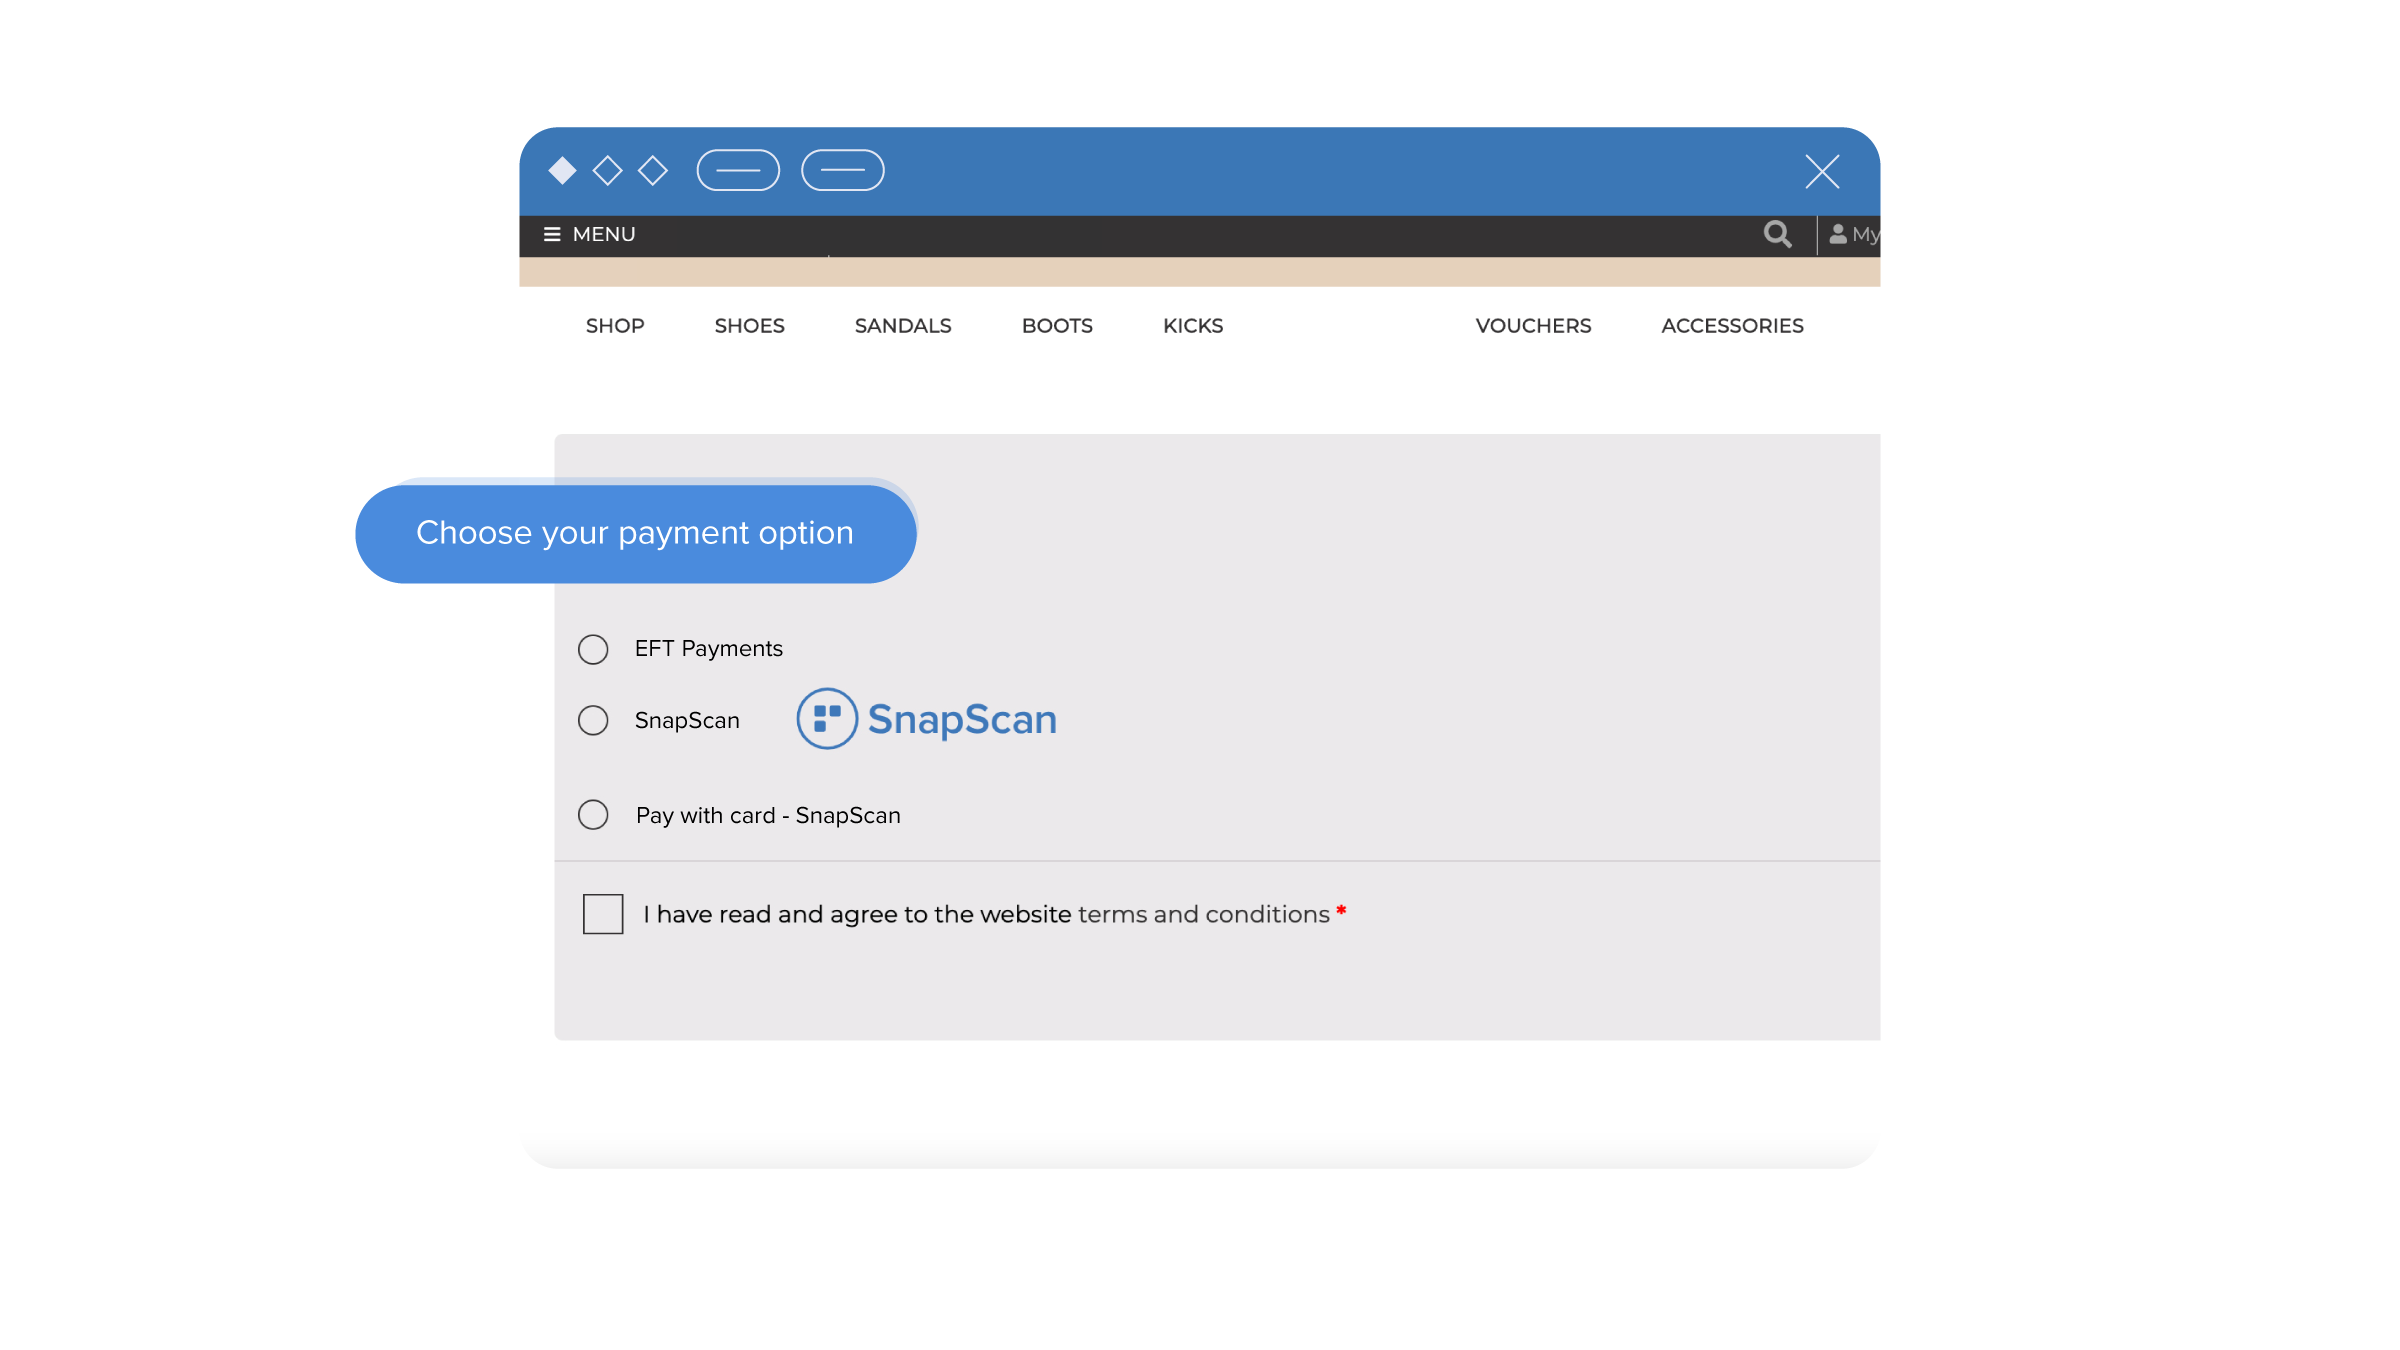
SnapScan app payments
After clicking “Pay with SnapScan”, customers will be presented with your SnapCode. If they’re on a mobile device, they can tap the SnapCode and be taken directly to their SnapScan app to complete their payment. If they’re on a desktop device, they can scan your SnapCode with their SnapScan app.
Card Payments – powered by SnapScan
After clicking ‘Pay with card’, your customers will be prompted to enter their card details to pay.
Once the payment has been completed successfully on the customer’s side, the order status will automatically change to ‘Processing’.
If you have any questions about setting up your plugin, please contact our support team and they’ll be happy to assist you.
Happy snapping!
Megan
Megan is a Content Strategist at SnapScan, with a book-buying habit that is spiraling out of control.
Related articles
4 easy-to-use ecommerce platforms you can use to build your online store
Find a platform that suits the needs of your small business.

8 things you should consider when creating an online store
Creating an online store doesn't have to be an overwhelming experience.

11 online business ideas for budding entrepreneurs
Become your own boss when you start one of these online businesses.

Payments in a snap for every type of business
Sign up